Making jerky treats (new material)
One of my favourite kitchen gadgets is my food dehydrator. When Miss Lilly was alive, I used it often to make meat jerky treats for her and our dog friends. That way, I had complete control over what went into their treats.
Here are some tips for making great dog treats with a food dehydrator.
Tip 1. You don't need a large food dehydrator, but I do recommend you spring for one that has its engine at the back and blows hot air over horizontal trays.
(Mine is shown below with its clear plastic front door pulled all the way up and sitting on top of the unit, which has six drying trays.)
The little one I had when I wrote Feeding Miss Lilly had four trays, and it was plenty big enough for us (a single person with an only dog). I also used it to dry herbs from my garden, fruit that was in season and abundant, and sprouted-grain crackers and breads (when I was on my raw-vegan jag...).
I never had any problems with bacterial contamination, as I always washed the trays well with hot, soapy water after making meat jerky.


Feeding Miss Lilly
on feeding dogs a great, nature-inspired diet
revised edition
Dr Christine King
PRINT EDITION
USD: 23.96 | AUD: $32.92
eBOOK EDITION
USD: $12.10 | AUD: $17.10
Tip 2. If you can, buy a food dehydrator that has a timer. That way, you can set it and forget it. It doesn't even matter if it completes its drying time while you're asleep or away, as the fully dried food can safely sit in the dehydrator for several hours at room temperature.
(In very humid or rainy weather, I might give it another short blast if it has been sitting for hours at room temperature, just to make sure it hasn't absorbed any moisture from the air before I put it in a sealed container for storage.)
The top of my food dehydrator is shown below. For the jerky I'll describe in a minute, I set it for 12 hours at 55 C (~ 130 F)*. It was probably ready after 8 hours, but I went a bit longer, just to be sure. The thicker or more uneven the slices, the longer it takes to fully dry out.
*This temperature setting may seem a bit odd to some people (if not downright wrong!). It's 15 C lower than what is recommended for making jerky (70 C) in this machine. It's also 15 C or more higher than what is recommended by raw foodists, who want to keep the enzymes alive... This is the "Goldilocks" setting I've found to be the happy medium for jerky that dries quickly and still tastes good (according to my informal consumer surveys over the years).
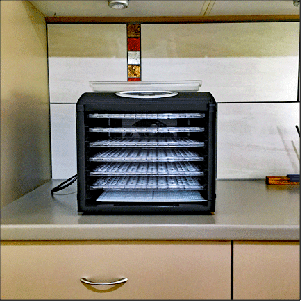
Front view of my six-tray food dehydrator.
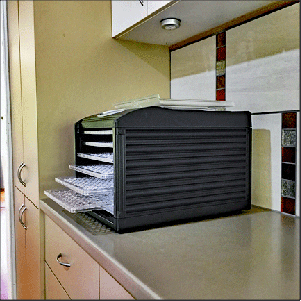
Side view of my food dehydrator, with its three lower trays pulled out a little.
Tip 3. Use very lean meat when making jerky. The fattier cuts of meat ooze oil (liquified fat) as they warm up in the dehydrator; and they don't store well at room temperature. (The fat oxidizes and goes rancid, especially during warm weather.)
The beef cut I used to make the jerky shown in the photo below was rump. That was just my best option of the available choices when I went to the grocery store to buy some meat to make jerky for this demo. Any cut is fine, as long as it's lean.
And choose 100% grass-fed and -finished (i.e., pasture-raised) meat whenever you can. (That's another reason I chose beef rump here. Options were limited.) Animals raised and finished (the last few weeks before slaughter) on grass have healthier body fat than those raised or finished on grains and other preserved feeds.
Whenever I have to choose between organic and grass-fed, I will always choose grass-fed over organic, for the simple reason that there is no requirement in organic food-animal production for the animal to be raised on any fresh plant material.
Most organ meats (liver, heart*, lung, kidney, tongue, gizzard, tripe) make excellent jerky, as they are naturally low in fat.
*One exception is heart. In adult livestock, there is often a rim of firm fat at the base (broad end) of the heart. It can be trimmed away with a sharp knife and fed (raw or cooked). Don't waste it; just don't dry it.
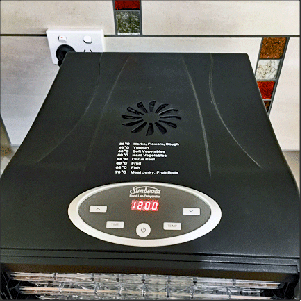
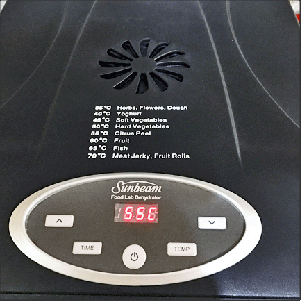
Top of my food dehydrator, showing its display for setting the drying time and temperature. For this jerky, I set the drying time for 12 hours.
... and the drying temperature was 55 C (~130 F).
Tip 4. Use a very sharp knife. The sharper the knife, the safer it is to use — paradoxical, I know, but I speak from painful experience...! And the sharper the knife, the thinner and more uniform the slices will be.
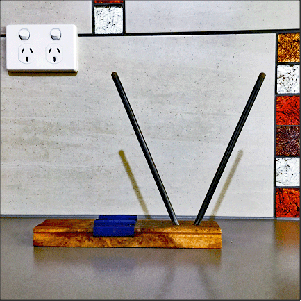
The two photos below show the wonderful knife sharpener a friend gave me years ago and which I've carted around from place to place, and country to country, ever since. (Thank you, Walter!) It consists of a pair of ceramic rods that fit into holes in a wooden base. When not in use, the "antennae" can be pulled out and stored in a little plastic holder on the base. But I keep it set up and ready to use at all times — to remind me to sharpen my darn knife before using it!! 😝
In the photos above and below, you also see my bright-blue plastic cutting board. I have a set of these, each a different colour, so that I can keep one just for raw meat. I much prefer a wooden cutting board, but plastic is far easier to clean and disinfect, so for raw meat I always use a plastic cutting board that is reserved for this specific use.
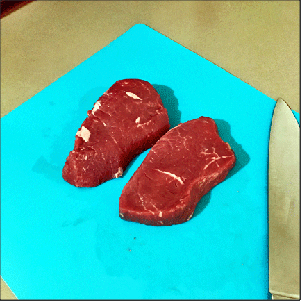
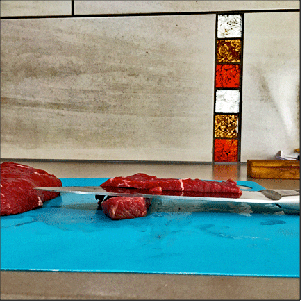
Use very lean meat when making jerky. The white streaks in these pieces of beef are connective tissue, not fat.
I try for slices that are a fairly uniform 6 mm (1/4 inch) thick.
Tip 5. The thinner and more uniform the slices, the faster and more evenly they dry. For all my efforts to cut translucent slices (like carpaccio), the best I'm generally able to do with my knife skills and patience (or lack thereof 🤣) is slices that are ~ 6 mm (1/4 inch) thick, such as the one shown in an earlier photo.
As long as they're fairly uniform in thickness, they'll dry evenly and store well.
"Do you cut with the grain (of the meat) or across the grain?" It doesn't matter when you're using a very sharp knife. The final texture of the jerky varies a bit with the direction of the slice, but dogs don't notice, nor do they care, so please yourself! 🙂
Tip 6. Place each slice on the drying tray so that the pieces aren't touching each other. That way, they'll dry more quickly and evenly.
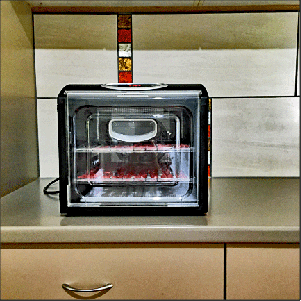
Tip 7. Unless you're using all of the trays, remove the trays not in use and spread out the loaded trays so that the hot air circulates well throughout the 'cabin'. This way, the loaded trays will dry more quickly and evenly.
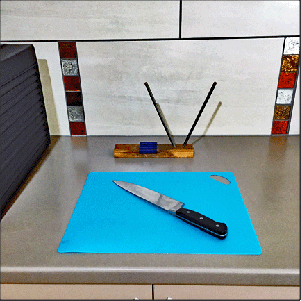
My colour-coded plastic cutting board, sharp knife — and most importantly, my knife sharpener!
Close-up of my ceramic knife sharpener. (It reminds me of My Favorite Martian! 😂)
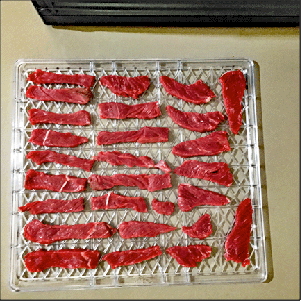
Make sure the pieces aren't touching as you lay them on the tray.
Remove the trays not in use and spread out the loaded trays.
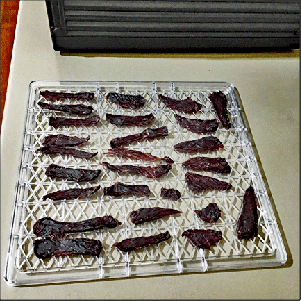
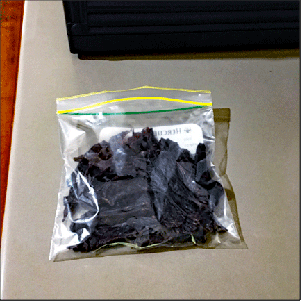
Tip 8. Once the jerky is fully dried, let it cool to room temperature on its tray. Then put it in an airtight container, such as a ziplock bag or cookie jar, and store it in the cupboard.
When fully dried, it should keep for several months at room temperature — although most well-loved dogs won't allow such a travesty. 🤣
Tip 9. Wash the trays with hot, soapy water and a brush, to make sure you remove every particle of animal matter from the trays. Allow them to air-dry before putting them away.
Really, this was all I ever did, and I never once made myself sick by sharing the food dehydrator with the dogs.
If I'd made jerky from a bloody cut of meat (e.g., liver from wild deer), I would also be sure to thoroughly clean the interior of the dehydrator to remove all traces of blood. In addition, I'd put a layer or two of paper towel in the bottom of the dehydrator before adding the loaded trays, to make cleaning up easier.
Below are a few more photos. These ones are of jerky made from organ meats.
Fully dried beef jerky.
Once the dried pieces have cooled to room temperature, store them in an air-tight container, such as a ziplock bag.
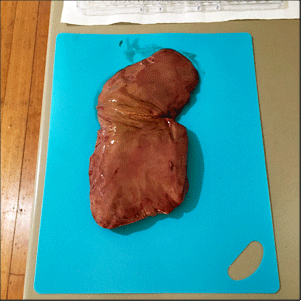
Lamb liver, ready to be sliced.
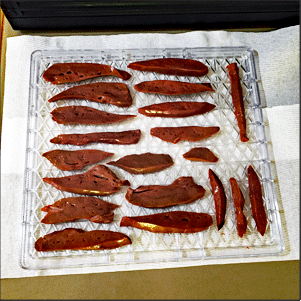
Slices of lamb liver on the drying tray, ready to be put into the food dehydrator. Liver is quite a bloody organ, so it can take a bit longer to dry than muscle meat. Regardless of the timer, check that the thickest pieces are completely dry before calling it done.
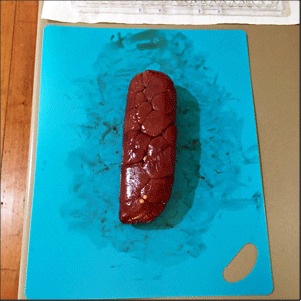
Beef kidney. It can be sliced across or lengthwise, but note that cattle kidneys are lobulated (multiple small lobes), so slicing it across or on an angle is easiest.
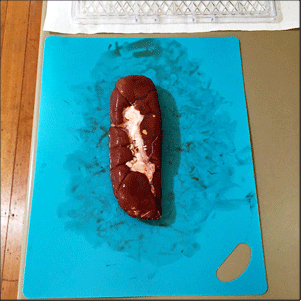
Underside of the beef kidney. There is a pad of firm, white fat on the underside which must be trimmed away before drying. Fatty jerky doesn't store well, as the fats oxidise (go rancid) over time. Not only do oxidised fats smell and taste bad, they are pro-inflammatory substances.
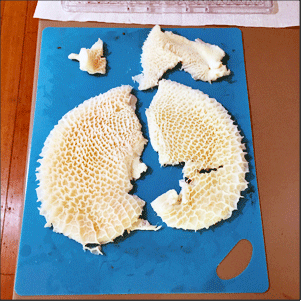
Beef tripe, cleaned and bleached of its normal grass-green pigments and microbes.
This particular organ, with its honeycomb-like lining, is the reticulum. The linings of the other two 'forestomachs' that may also be sold as tripe (the rumen and the omasum) look quite different, but they're all 'tripe', and all are good food for dogs.
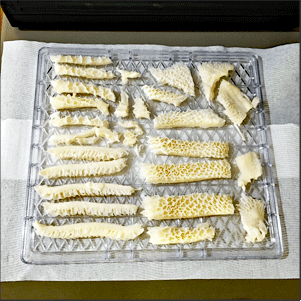
Slices of tripe on the drying tray, ready to be put into the food dehydrator. Tripe is a surprisingly "meaty" organ, so it slices very well. It dries quickly and evenly, and makes a wonderful crunchy treat.